In my latest flutter project I needed to create different versions of my app for the different development environments. A development version which uses the development backend, a staging version which uses the staging backend and, you guessed right, a production version which uses the production servers. In Android those versions are called flavors and in iOS this can be done with schemes. But how can this be achieved within flutter? There are a few blog posts online showing how to do it. For android those tutorials worked great but for iOS in everyone of them a litte piece of information was missing and I had to play arround quite some time before I got it right. Therefore follows my step-for-step guide for configuring flavors in flutter for iOS.
Demo Setup
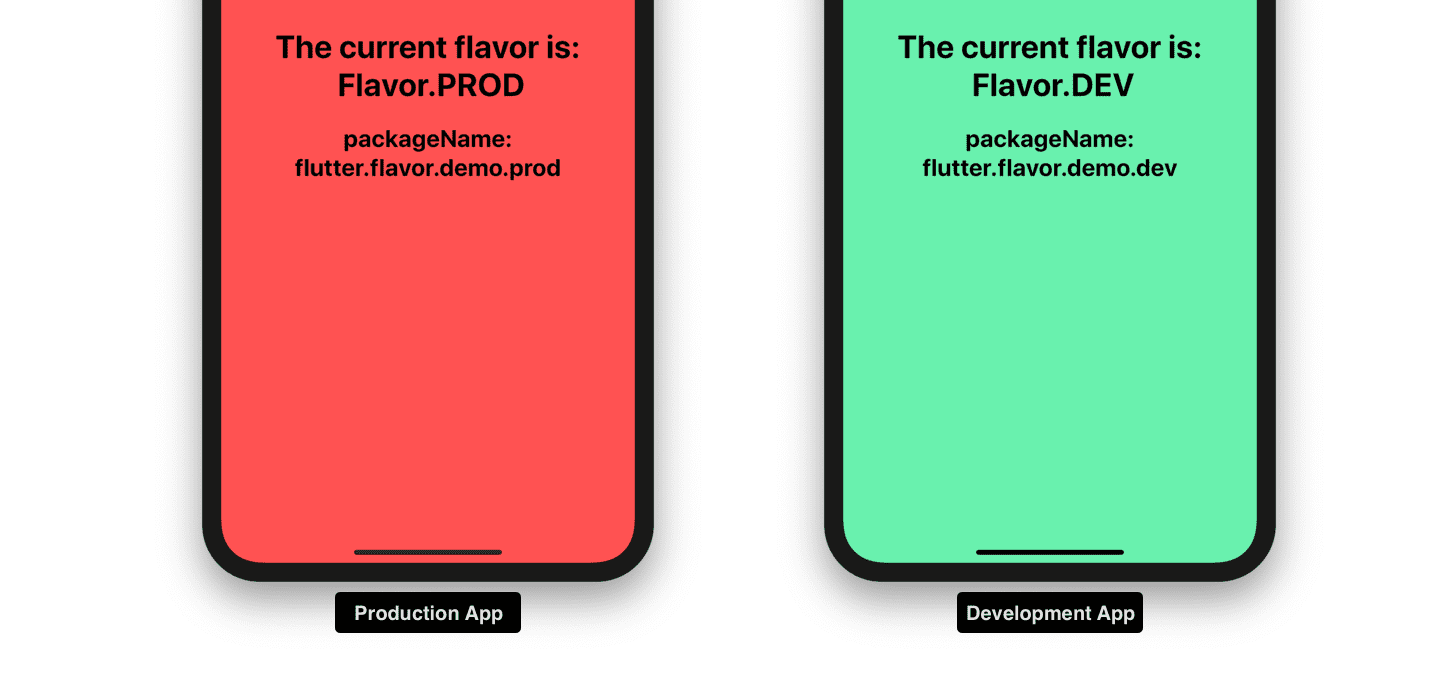
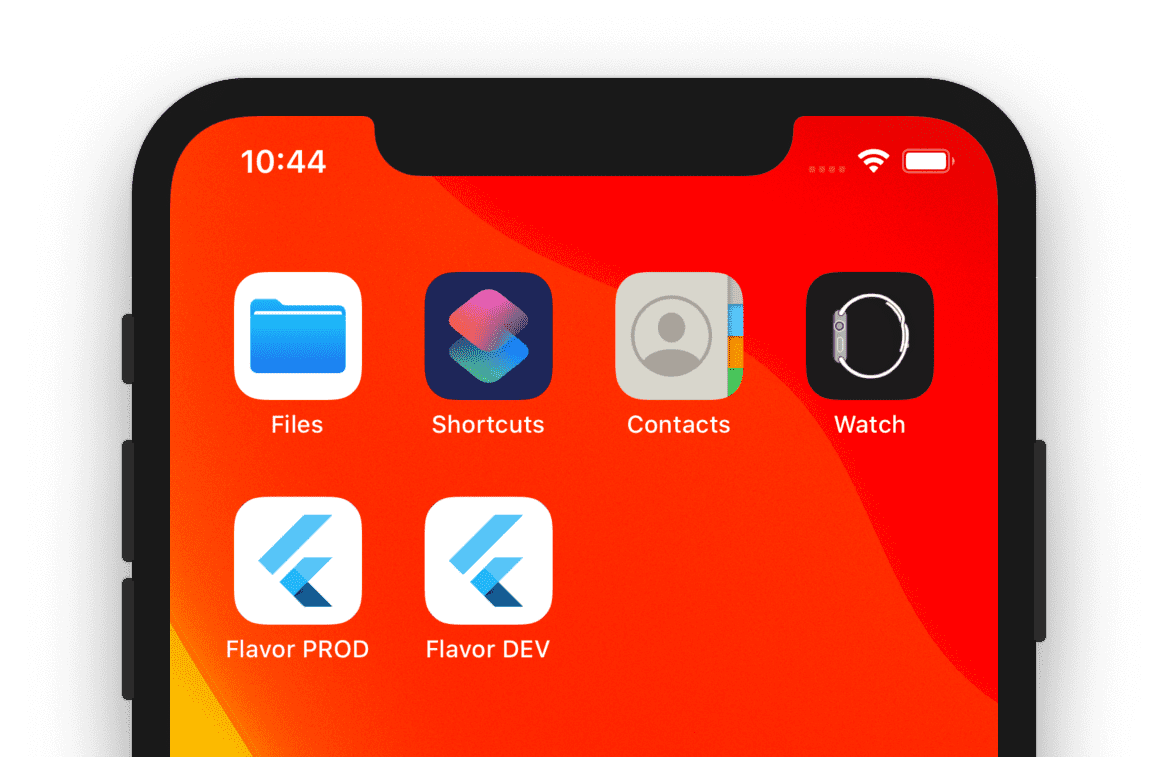
In this guide we will create a demo app. It can be build in two flavors devand prod and will display its current flavor and the app's package name in the middle of the screen. The app will look like this:
You can find the source code for the whole app here. The widget, which you see in the screenshot above, is defined in flavor_demo_app.dart. In regards to flavors only the first lines of the file are interesting. A Flavor enum is defined, which we use to distinguish between flavors. Also the main widget FlavorDemoApp takes a Flavor as input, so it can decide in its build method what background color to choose and what text to display depending on the given flavor.
// flavor_demo_app.dart

enum Flavor { DEV, PROD }

class FlavorDemoApp extends StatelessWidget {
  final Flavor flavor;

  FlavorDemoApp(this.flavor, {Key key}) : super(key: key);
  ...
}
So that is our demo setup. Our next steps are to add flavors to it.
There will be three steps:
- Setting up flavors in flutter code
- Setting up flavors (schemes) in the iOS Project
- Combining both worlds by showing how to combine flutter flavors and iOS schemes
1. Setting up flavors in flutter code
Inside our flutter code we cannot detect the iOS schemes which we will configure later in the iOS project. Therefore to distinguish between different flavors inside our flutter code we need to configure different entrypoints. I will use the default main.dart for prod and create a new entrypoint main_dev.dart for dev. Each of those entrypoints initializes the FlavorDemoApp with its according flavor.
// main.dart

/// Entrypoint for production flavor.
/// Inject Flavor.PROD into App.
void main() {
  runApp(FlavorDemoApp(Flavor.PROD));
}
// main_dev.dart
/// Entrypoint for development flavor.
/// Inject Flavor.DEV into App.
void main() {
runApp(FlavorDemoApp(Flavor.DEV));
}We can run those different entrypoints with the -t flag (t for target) of the flutter command:
flutter run -t main.dartfor theprodflavor. Or justflutter runbecause it usesmain.dartas default.flutter run -t main_dev.dartfor thedevflavor.
Depending on which entrypoint you choose you should see the corrosponding flavor screen on your simulator or device.
Note: You could also rename the main.dart file to main_prod.dart. In this case flutter run without t flag wont work anymore and you have to use the flag for both prod and dev.
The first step is done. We can create and run different flutter flavors in our app. You may have noticed that the displayed package name (bundle identifier in ios terms) stays the same. That means we couldn't install the dev and prod flavor side by side on our device because both share the same package name which must be unique. In the next step we will configure our ios project so it can create two different apps each with its own package name and app name.
2. Set up schemes in iOS Project
Build configurations
We start by looking at build configurations in XCode. Build configurations define properties which we can reference later. Open the ios module in XCode (open ios/Runner.xcworkspace) and take a look at the contents of the Runner/Flutter folder. There should be already three configurations.
Generated.xcconfig is generated by flutter and contains information like the FLUTTER_BUILD_NUMBER or the FLUTTER_TARGET which we defined by running flutter run with the -t flag. e.g. running flutter run -t lib/main_dev.dart results in FLUTTER_TARGET=/Users/sven/development/flutter_flavor_demo/lib/main_dev.dart. When running flutter run -t lib/main.dart it results in FLUTTER_TARGET=/Users/sven/development/flutter_flavor_demo/lib/main.dart. Do not edit Generated.xcconfig, it is generated by flutter and all changes to it will be overwritten.
Debug.xcconfig and Release.xcconfig are the configurations which are used at the moment. We will use them as our configurations for the prod flavor.
// Debug.xcconfig
#include "Pods/Target Support Files/Pods-Runner/Pods-Runner.debug.xcconfig"
#include "Generated.xcconfig"
// Release.xcconfig
#include "Pods/Target Support Files/Pods-Runner/Pods-Runner.release.xcconfig"
#include "Generated.xcconfig"In the first line the configuration for Pods (ios packages added via cocoapods, a dependency manager for iOS projects) is included. This line might be missing if you do not use any plugins yet.
In the second line the generated configuration from flutter is included.
We will add two new properties to Debug.xconfig and Release.xconfig:
// bundle_suffix used in the bundle id of the app
bundle_suffix=.prod
// the name displayed below the app icon on the home screen
app_display_name=Flavor PROD
Next we duplicate both files and name them Debug-dev.xconfig and Release-dev.xconfig. Those are our configuration for the dev flavor. Also we change our properties accordingly so our configs look likes this:
#include "Pods/Target Support Files/Pods-Runner/Pods-Runner.release.xcconfig"
#include "Generated.xcconfig"
bundle_suffix=.dev
app_display_name=Flavor DEV
Note: When duplicating make sure the files are duplicated in Flutter folder, not anywhere else in the project.
Schemes
Next we need to wire our xcconfigs with the general project settings and create schemes in the run configurations.
Select the Runner Project and then the info tab. Under configurations copy each entry and add the -dev suffix. After that you can select the correct *-dev.xcconfig file for each of the *-dev configurations. It is easiest to take a look at the screen capture below:
Next we have to create schemes. Next to the RUN Button select Runner and choose Manage schemes in the drop down. Rename Runner to prod and then create a new scheme name dev. Edit the devscheme and for each entry (Run, Test, Profile, Analyze, Archive) change the Build configuration to the *-dev variant.
Bundle identifier aka packageName
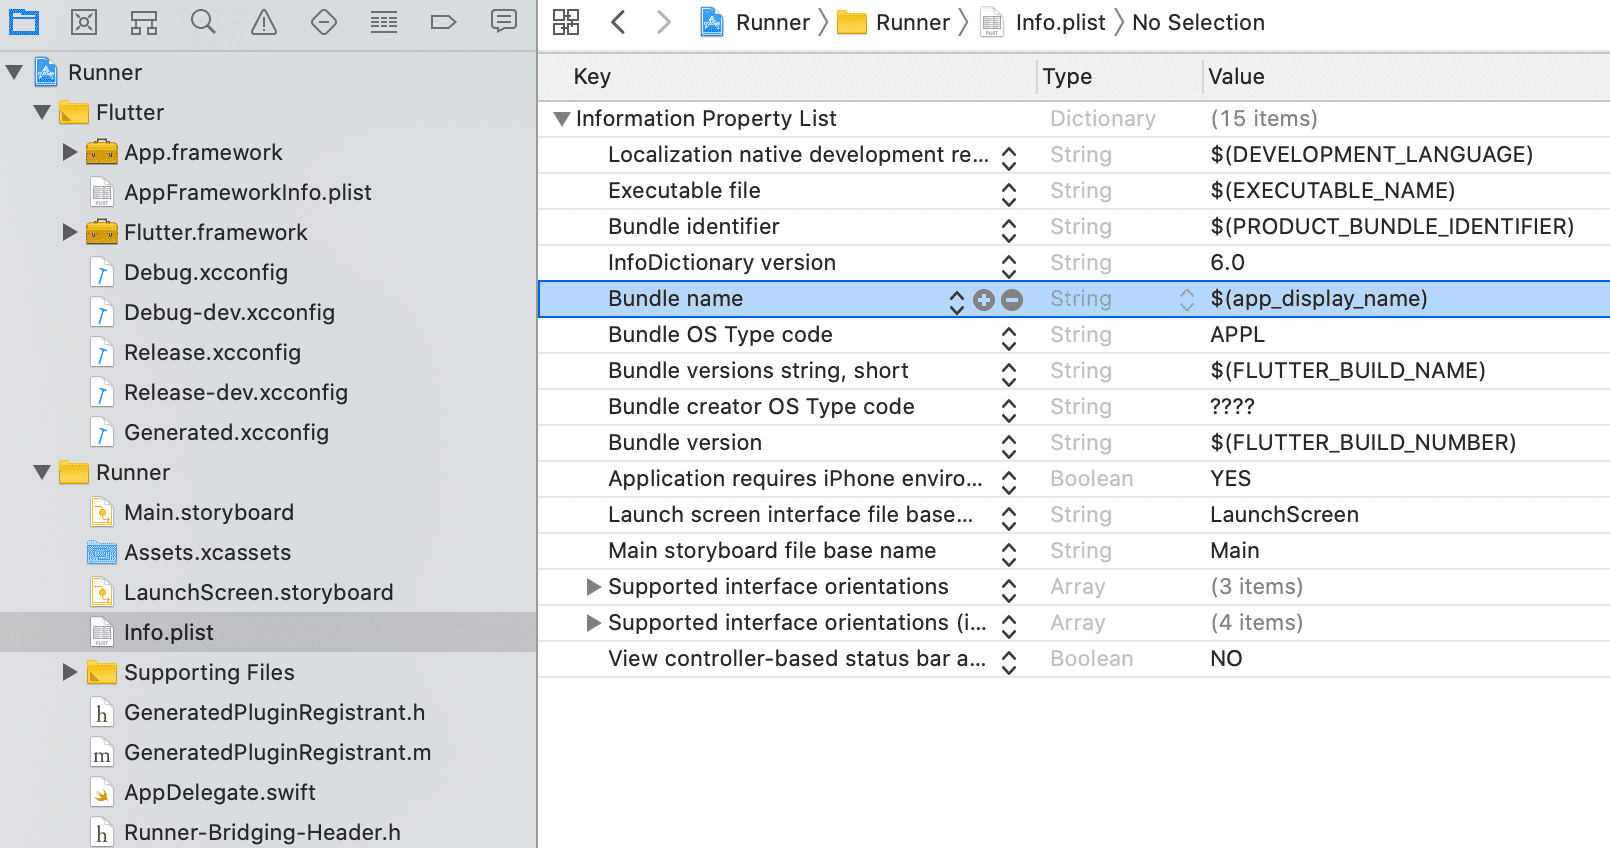
To adjust the bundle identifier of the app we add the bundle_suffix to the Bundle identifier entry in info.plist. So it looks like: $(PRODUCT_BUNDLE_IDENTIFIER)$(bundle_suffix)
This allows us to install the dev and prod flavor on the same device.
App name
To adjust the appname we set the Bundle name entry in info.plist to $(app_display_name).
Finally, everything is set up so the app can be build in two schemes which use a different bundle identifier and app name. To test it run flutter run --flavor prod or flutter run --flavor dev from the root of the flutter project. The display package name should be for dev flutter.flavor.demo.dev and for prod flutter.flavor.demo.prod. And there will be two different apps installed on the home screen Flavor DEV & Flavor PROD.
Note: I had problems when running the schemes directly from XCode from time to time, because the Pods setup didn't work correctly. In those cases it helped to run the flavors by using the flutter command line as described above.
3. Combining both worlds - Flutter flavors and ios schemes
The only step left is to combine our flutter flavors (the entrypoints) and the ios flavors (ios schemes) by running:
flutter run -t lib/main.dart --flavor prod
flutter run -t lib/main_dev.dart --flavor dev
Now we should have two differnt apps as seen below:
Thats it, we are done!
If you have questions, feedback or other comments feel free to reach me on Twitter.
Thanks
As said in the introduction there are already great other resources online. I found Build flavors in Flutter (Android and iOS) with different Firebase projects per flavor and Flavoring Flutter very helpful.